

Embarking on a journey out at sea or hitting the open road in your caravan is an exhilarating experience. However, ensuring reliable power is essential to truly enjoying your time off the grid. That’s where marine and Caravan-Inverters come into play! In this guide, we’ll walk you through everything you need to know about installing these power-packed devices in your boat or caravan. From choosing the suitable Marine Inverter to expert installation tips, prepare to power up and set sail confidently!
A Guide to Installing a Marine-Inverter: Essential Tips and Tricks
When installing a Marine-Inverter on your boat, preparation is critical. Start by selecting the right location for your inverter installation – somewhere dry and well-ventilated is ideal. Before getting started, disconnect all power sources to avoid accidents during installation.
Next, gather all the necessary tools and materials for a smooth installation. This may include wiring, connectors, mounting hardware, and, of course, your new Marine-Inverter. Double-check the manufacturer’s instructions to ensure you have everything required for the job.
Carefully follow the step-by-step guide provided by your Marine-Inverter to ensure proper installation. Pay close attention to safety precautions and recommended practices throughout the process. Once installed, test your Marine-Inverter to verify it’s functioning correctly before hitting the water.
Marine-Inverter Installation Made Easy: Step-by-Step Guide
Are you looking to install a Marine-Inverter on your boat but not sure where to start? Fear not—this step-by-step guide will make the process a breeze.
Step 1- Gather Materials and Tools
Before installing, ensure you have all the necessary materials and tools. This will include your Marine-Inverter, appropriate wiring (usually 8 or 4 AWG), a fuse holder with fuses, battery terminals, cable ties, wire strippers/cutters, and a drill with various-sized bits. You may also need additional hardware, such as ring terminals and heat shrink tubing.
Step 2- Choose an Installation Location
The first step in installing your Marine-Inverter is choosing the best location on your boat. The ideal spot should be dry and well-ventilated to prevent moisture or overheating issues. It should also be close to your batteries to minimize the length of wiring needed. Additionally, consider how accessible the location is for maintenance and repairs.
Step 3- Mount the Inverter
Once you have chosen a suitable location, mount the inverter using screws or bolts. Ensure it is securely attached to prevent movement while your boat is underway.
Step 4- Connect Batteries to Inverter
Connect your battery bank’s positive (+) terminal to the positive (+) input terminal on the inverter using appropriate-sized wiring.
With these simple steps, installing a Marine-Inverter can be straightforward and enhance your boating experience with a reliable power supply onboard.
How to Choose the Best Marine-Inverter for Your Boat?
Several key factors must be considered when choosing the best Marine-Inverter for your boat. First and foremost, you’ll need to determine the power requirements of your onboard electronics and appliances. This will help you select an inverter with the appropriate wattage capacity to meet your needs. Additionally, consider the size and weight of the inverter, as space may be limited on a boat. Opt for a compact, lightweight model that can easily fit into your designated installation area without adding unnecessary bulk.
Another important aspect to think about is the type of wave output produced by the inverter. Pure sine wave inverters are ideal for sensitive electronic devices, providing clean and stable power output. Don’t forget about durability and reliability. Look for marine-grade inverters specifically designed to withstand harsh marine environments with features like corrosion resistance and waterproofing capabilities. You can confidently choose the best Marine-Inverter for your boat’s electrical system by carefully evaluating these criteria.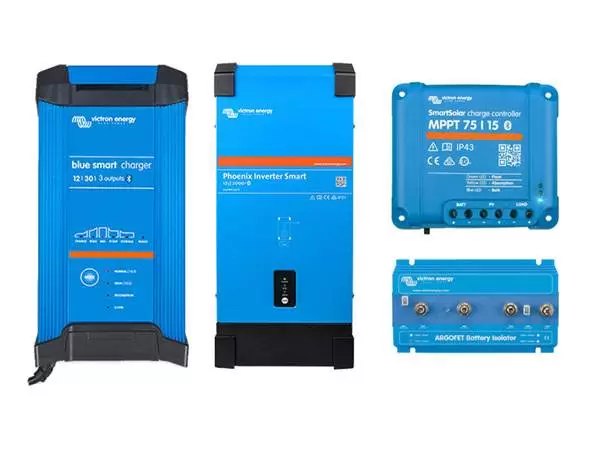
Essential Tools and Materials for Installing a Marine-Inverter
Having the right tools and materials is crucial for successfully installing a Marine-Inverter on your boat.
- First, ensure a good-quality marine-grade inverter suits your boat’s power needs. Choosing an inverter that can handle the electrical load without any issues is essential.
- Next, gather all the necessary tools, such as wire cutters, crimping tools, screwdrivers, and cable ties. These tools will help you properly connect the inverter to your boat’s electrical system.
- In addition to tools, you’ll also need various materials, such as marine-grade wiring, fuses, terminals, and heat shrink tubing. Using high-quality materials ensures durability and safety for your Marine-Inverter setup.
- Remember to use proper mounting hardware to secure the inverter on your boat. Mounting it securely will prevent vibrations or movements that could damage the unit during operation.
These essential tools and materials will make installing a Marine-Inverter smoother and ensure a reliable power supply on your nautical adventures.
Top Considerations When Installing an Inverter for Your Caravan
When installing an inverter for your caravan, it’s crucial to consider the power requirements of all your appliances. Make a list of what you’ll be running off the inverter to determine the size needed. Another critical consideration is where to place the inverter. It should be installed in a well-ventilated area away from moisture and heat sources to ensure optimal performance and longevity.
Proper wiring is essential for safety and efficiency. Use high-quality cables with appropriate gauges based on the distance between the battery and the inverter. Also, remember to secure the inverter properly during installation. It should be mounted securely to prevent any movement while on the road.
Consult a professional if you need clarification on installing an inverter for your caravan. It’s better to seek expert advice than to risk damage or safety hazards later.
DIY Marine-Inverter Installation: Everything You Need to Know
Are you thinking about installing a Marine-Inverter on your boat yourself? You need to know everything to tackle this project like a pro. First and foremost, choose the right size and type of inverter for your specific needs. Consider factors such as wattage requirements, battery capacity, and the appliances you’ll be running. Before diving into the installation process, gather all the necessary tools and materials. You’ll likely need cables, connectors, fuses, and mounting hardware.
When wiring your Marine-Inverter, follow manufacturer instructions carefully to ensure proper connections. Pay close attention to polarity markings and avoid overloading circuits. Safety should always be a top priority during DIY installations. Disconnect all power sources before beginning work, and consider consulting with a professional if needed.
Following these tips and guidelines, you can confidently complete a DIY Marine-Inverter installation on your boat.
Wiring Your Marine-Inverter: Best Practices and Safety Tips
Following best practices and safety tips is crucial for a successful installation when wiring your Marine-Inverter. First and foremost, ensure you have the right tools on hand before starting the wiring process. This includes wire cutters/strippers, heat shrink tubing, crimping tools, and a multimeter for testing.
Next, carefully plan the placement of your inverter to minimize the length of cables needed. Shorter cable runs reduce voltage drop and improve efficiency. Always use marine-grade wires designed for wet environments to prevent corrosion and ensure longevity.
Properly size your cables based on the maximum current draw of your inverter to avoid overheating or electrical fires. Double-check all connections before powering up your system to guarantee everything is securely fastened. Safety should always be a top priority when working with electrical components on your boat.
Common Installation Mistakes to Avoid with Caravan Inverter
When it comes to installing a Caravan-Inverter, there are some common mistakes that you’ll want to avoid. One of the most frequent errors is improperly sizing the inverter for your power needs. Make sure to calculate the wattage requirements of all your devices before selecting an inverter. Another common mistake is not securing the inverter properly. Ensure it is mounted securely to prevent any movement while on the road. Additionally, failing to use the correct gauge wire or fuse size can lead to overheating and potential safety hazards.
Improper ventilation is another pitfall to watch when installing a Caravan Inverter. Allow for adequate airflow around the unit to prevent overheating. Make sure all connections are tight and secure to avoid any electrical issues down the line. By removing these common installation mistakes, you can ensure a smooth and safe operation of your Caravan-Inverter system.
Step-by-Step Guide to Installing an Inverter in Your Caravan
Are you ready to power up your caravan with a new inverter? Installing an inverter can provide you with the convenience of having electricity on the go, whether for charging devices or running appliances. Here is a step-by-step guide to help you through the installation process. Choose the right location for your inverter installation. It should be close to your battery to minimize power loss and ensure efficient operation. Make sure to secure the inverter properly using mounting brackets or screws.
Next, connect the DC input cables from your caravan’s battery to the inverter’s input terminals. Double-check that all connections are tight and secure to prevent any issues down the line. Then, connect the AC output cables from the inverter to your caravan’s electrical system. Follow manufacturer instructions carefully, and consider using protective gear like gloves during this step.
Test your newly installed inverter by turning it on and checking if everything functions as expected. If there are any hiccups, double-check your connections and consult professional help.
Tips for Choosing the Right Inverter for Caravan
When choosing the right Inverter for Caravan, there are a few key factors to consider. Think about the power requirements of your appliances and devices. Select an inverter to handle the total wattage you need on the road. Consider the type of wave output, which is a pure sine wave or modified sine wave. Pure sine wave inverters are ideal for sensitive electronics like laptops and TVs, providing clean and stable power. On the other hand, modified sine wave inverters are more budget-friendly but may not be suitable for all devices.
Size matters, too! Ensure you have enough space to install your chosen inverter properly. Also, consider additional features such as USB ports or remote control capabilities for convenience during your travels. Don’t forget about safety certifications and warranties when making your decision. Opt for a reputable brand with good reviews to ensure reliability on your journeys.
How to Safely Install an Inverter in Your Boat: Expert Advice?
When it comes to installing an inverter in your boat, safety should always be a top priority. As an expert advice, carefully read the manufacturer’s instructions before installing.
Choose the Right Inverter
The first step in installing an inverter is to choose the right one for your boat. Make sure to select an inverter specifically designed for marine use and with the appropriate wattage to power your desired devices.
Select a Suitable Location
Choose a dry location on your boat that is easily accessible for installation and maintenance. It should also be away from any sources of heat or moisture.
Install a Fuse
Before connecting the inverter, install a fuse or circuit breaker near the battery. This will protect your boat’s electrical system from overloading and can be easily replaced if it blows.
Connect the Battery Cables
Follow the manufacturer’s instructions to connect the positive and negative cables from the inverter to the boat’s battery terminals. Make sure the connections are secure and tight.
Connect AC Wiring
Next, connect the AC wiring from your inverter to any outlets or devices you want to be powered on your boat. Again, make sure all connections are secure.
Test the Inverter
Before using your inverter, test it to ensure everything works properly. Check all connections and outlets to ensure they are functioning correctly.
Maintenance
Regular maintenance is essential to keep your inverter functioning safely and efficiently. Check for loose connections or signs of damage and address them immediately.
Consult a Professional
If you need clarification on any part of the installation process, it is always best to consult a professional electrician or boat technician. They can provide expert advice and ensure proper installation for optimal safety.
Marine-Inverter Installation: Key Differences from Caravan-Inverters
There are some key differences to consider when installing marine versus Caravan-Inverters. One significant distinction is the environment in which these inverters will be operating. Marine environments can expose equipment to salt water, humidity, and constant vibrations from the water, requiring marine-grade components specifically designed for such conditions.
Additionally, the power requirements on a boat may differ from those in a caravan. Boats often have unique electrical systems with different voltage needs compared to caravans. Choosing an inverter that aligns with your boat’s specific power demands is crucial. Furthermore, installation locations vary between ships and caravans. In a vessel, space is usually limited and exposed to potential splashing or submersion. Caravan installations typically have more protection from the elements but may require longer cable runs due to their size.
Understanding these key differences will help you select the suitable inverter for your marine vessel or caravan setup.
Conclusion
Attention to detail is crucial for a smooth and efficient setup for Marine Inverter and caravan installations. Understanding the unique requirements for boats and caravans will help you customize your approach for optimal performance, whether you’re a seasoned DIY enthusiast or seeking professional assistance. As technology continues to evolve, so do the options available for powering your mobile adventures. Embrace innovation and stay proactive in keeping your electrical systems up-to-date and reliable for all your travels ahead.
FAQ’s
1. Can I install a Marine-Inverter on my own?
Installing a Marine-Inverter can be done DIY if you have the right tools and knowledge. However, if you are unsure or uncomfortable with electrical work, it is always best to seek professional help to ensure safety.
2. How do I choose the right size of a Caravan Inverter?
The size of the Caravan Inverter you need depends on the appliances you plan to power. Calculate the total wattage of all devices you want to run simultaneously and choose an inverter that can handle at least that amount.
3. Is it safe to use a Marine-Inverter during bad weather?
Using electronic devices powered by an inverter during lousy weather is not recommended, as water exposure can pose serious safety hazards.
4. Can I connect multiple batteries to my Marine-Inverter for more power?
Yes, you can connect multiple batteries to increase your power capacity. Just make sure they are correctly wired and matched for optimal performance.
5. How long does it take to install a Marine-Inverter?
The time needed for installation varies depending on your experience level and boat setup. On average, completing a full day today can take a few hours to complete.
| Other Good Articles to Read |
| Niche Blogs Connect |
| Blogs 97 |
| Blog Stitution |
| Blogs Unplugged |
| Blogs Cotch Rouge |
| Blog Signatr |
| Blog Sintonias |
| Blog Zilla |
| Consumer Forums |
| Finance Forums |
| G Blogs |
| Too Blog |
| Related Business Listings |
| Contact Directory |
| Local Business Profiles |